
Rally Bar 2 Wall Mount [Above Display] Installation Instructions
Tools Required
In addition to the parts included in the box, a drill, 6.5mm (1/4") drill bit, Phillips head/crosshead screwdriver, hammer, and spirit/bubble level are required.
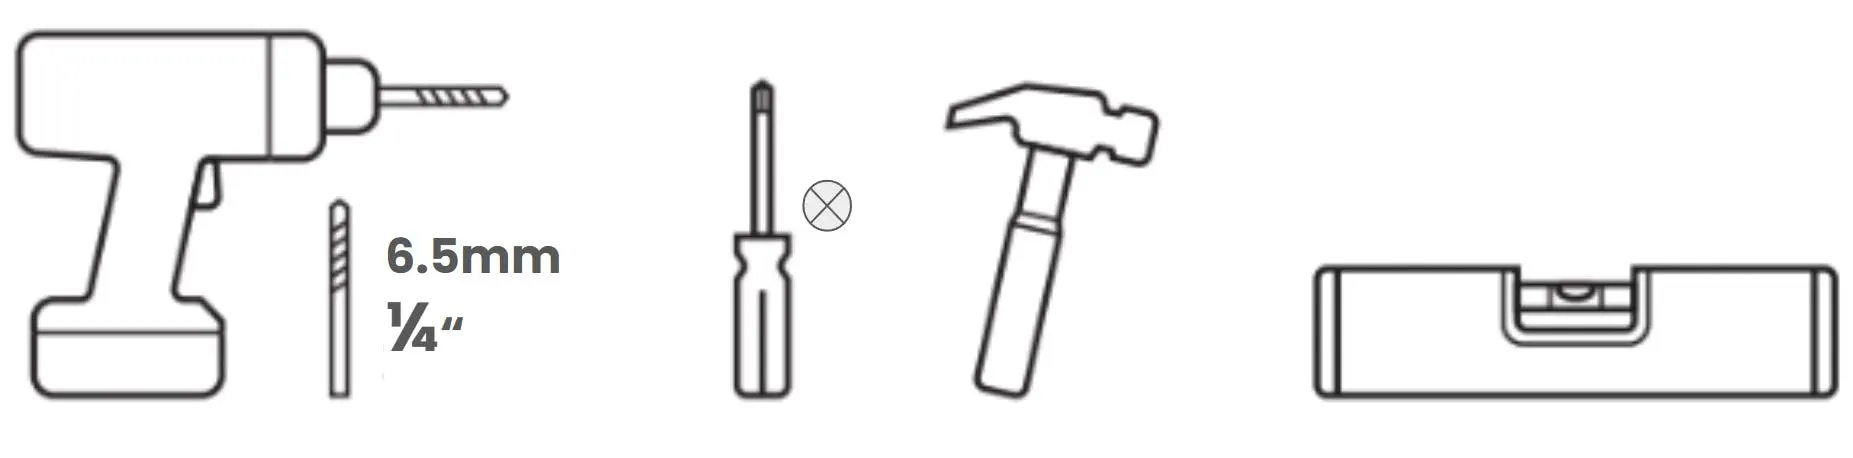
⚠️ NOTE: For your convenience, we've included anchors suitable for most office conditions. You are responsible for ensuring the mounting hardware is appropriate for the wall material in use.
Wall Mount Orientation
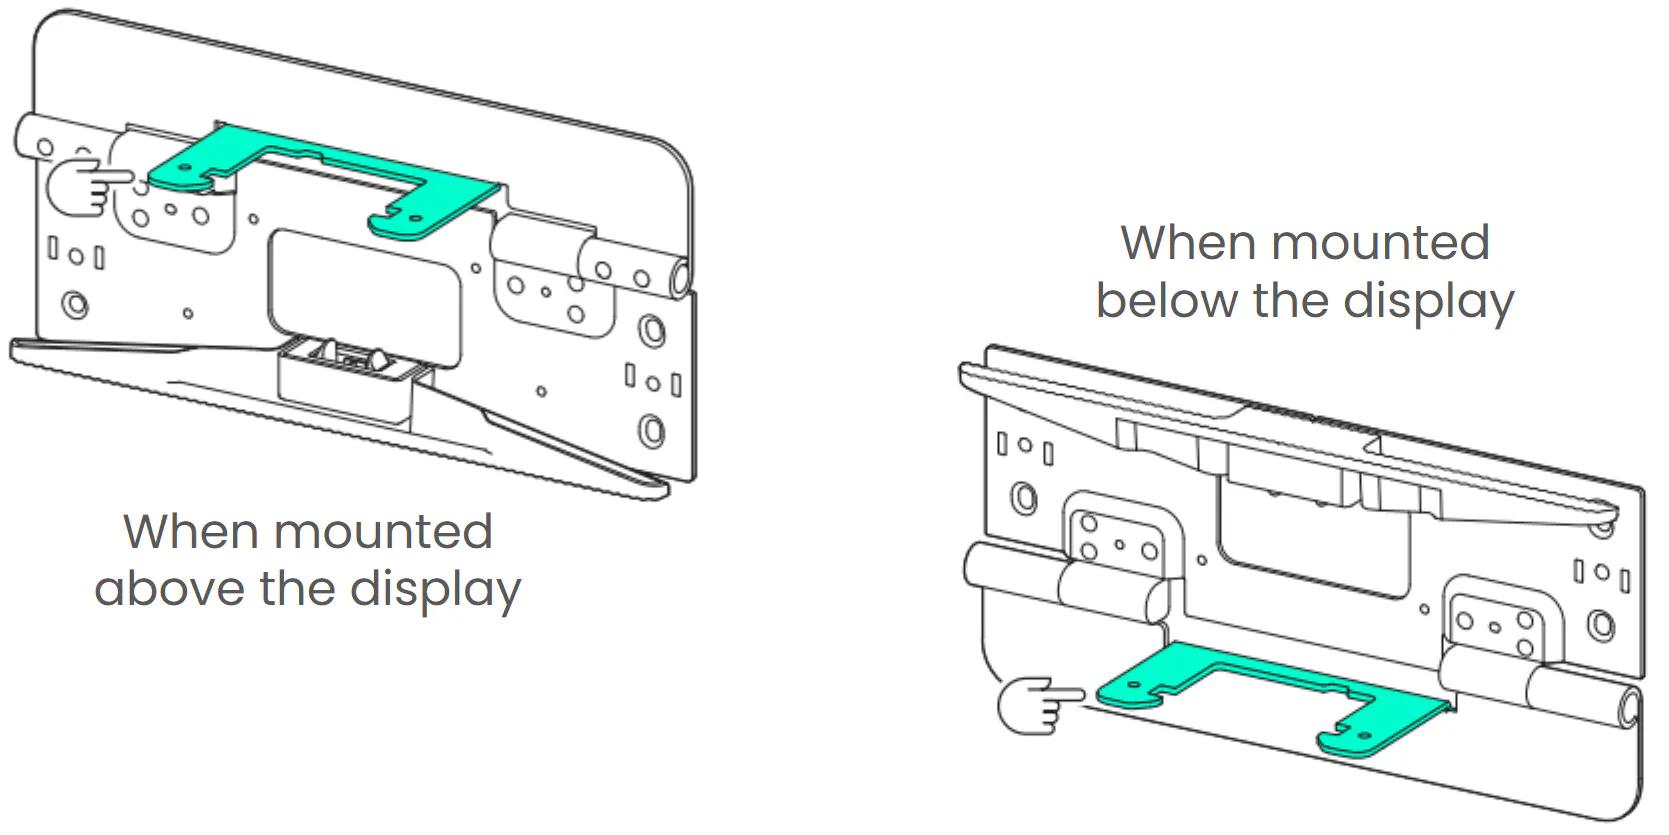
When Rally Bar 2 is mounted above the display, the mounting forks (highlighted above in Aqua) should be oriented toward the top (left image). To use the mount below the display, rotate it 180° so the mounting forks are facing down (right image).
Measure and Mark
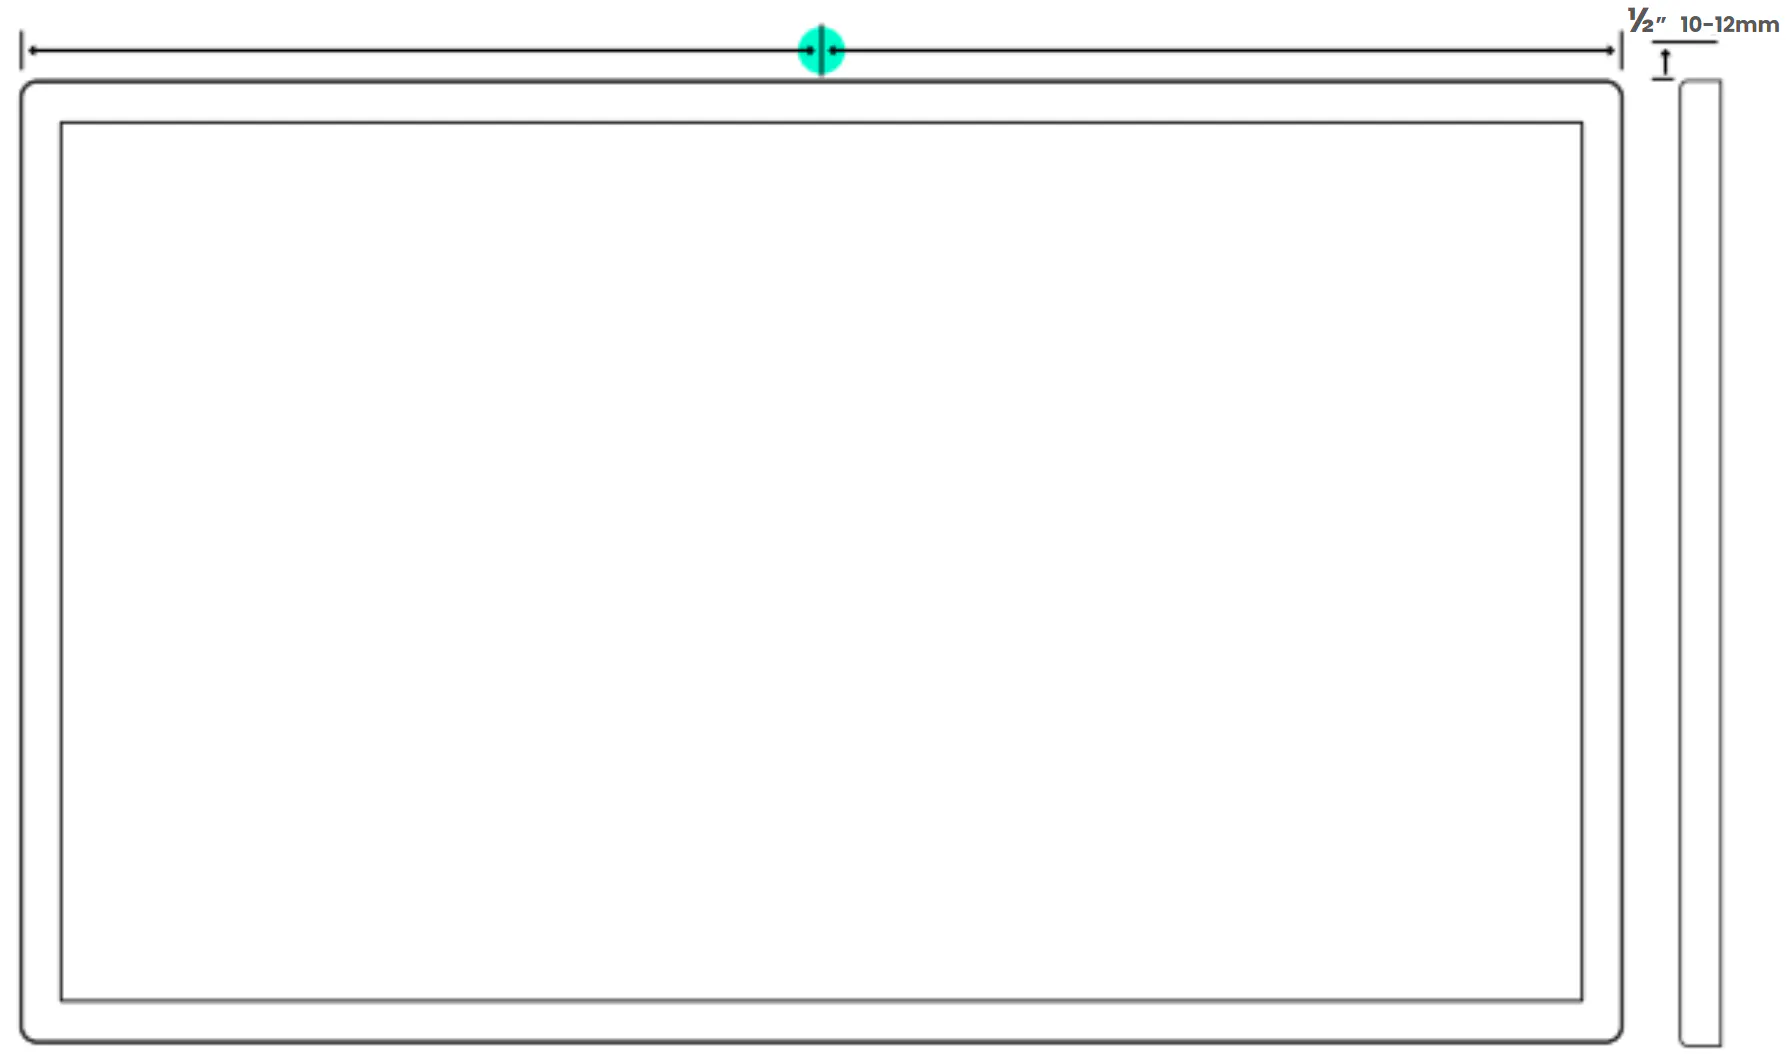
Locate and mark the center of your display.
Locate the top edge of your display and mark 1/2” (10-12mm) above this height.
Center the wall mount flat against the wall with the bottom edge located at your determined height from Step 2.
Mark the center of each mounting hole on the backplate (there are 4 in total).
Drill Holes and Affix Mount to Wall
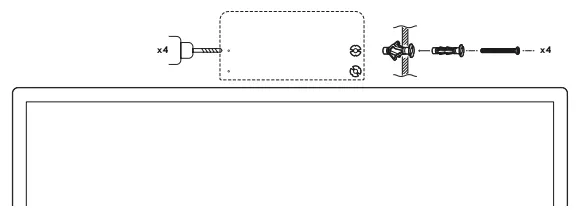
Using a 6.5mm (1/4") drill bit, drill 4 holes, and secure wall anchors.
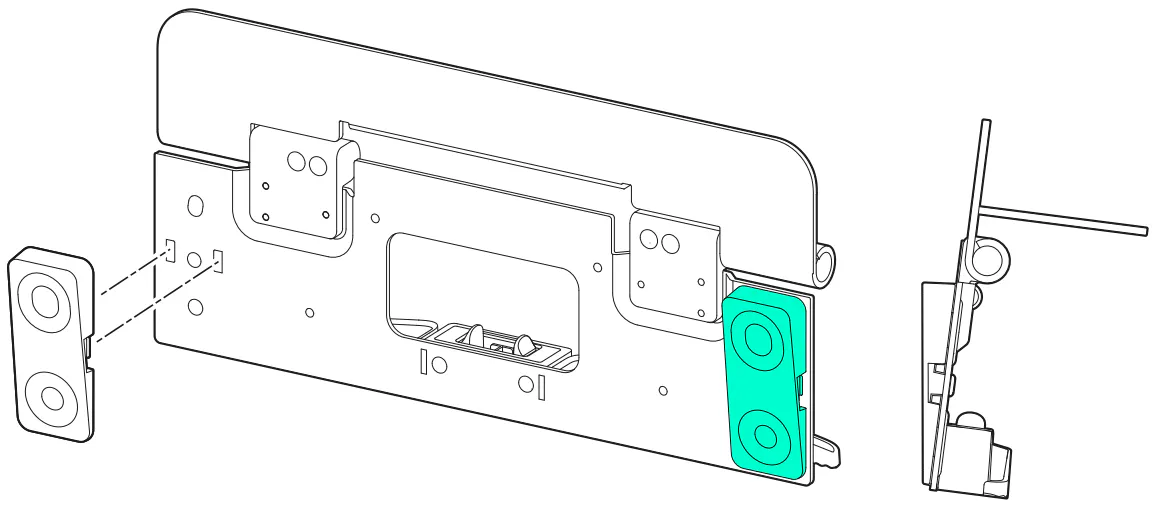
Turn the wall mount to work from the flat side (back). Snap plastic wedges so that the taller end points up. This should cause the wall mount to tilt toward the room. Use of this 7° tilt is required for all supported installations of Rally Bar 2 placed above the display.
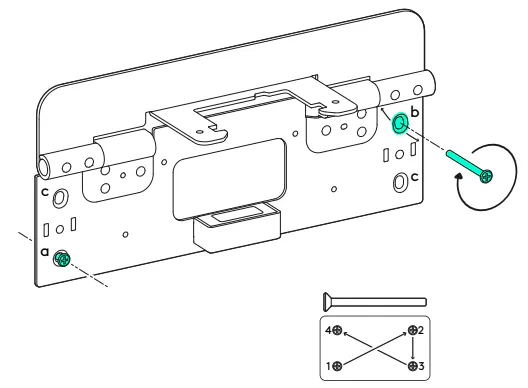
With the wedges in place, hold the mount against the wall and attach screw a leaving it slightly loose. Insert screw b and tighten while checking the mount remains level. Insert and tighten all screws.
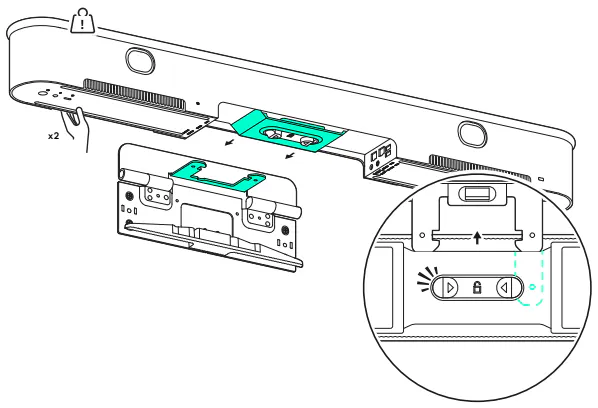
To attach Rally Bar 2, hold it face up with your hands supporting on the back of the device. Slide the device on the mounting forks until an audible “click” is heard.
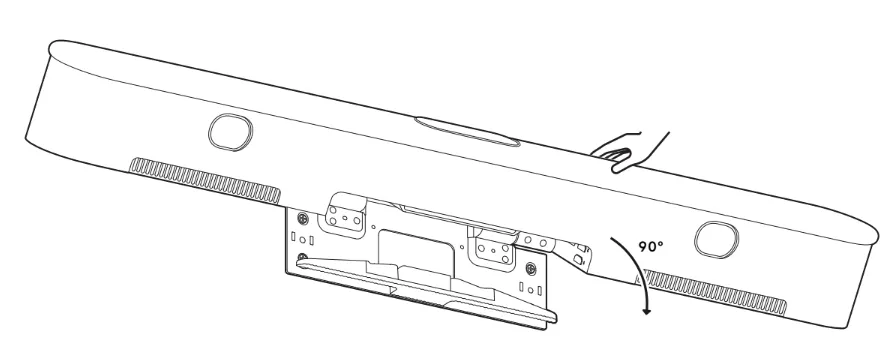
Rotate the product down 90˚ so that the camera is facing forward until an audible “click” is heard. The whole device, including wall mount, should be tilting 7° toward the room. Check the location and alignment of the product relative to the display and make adjustments to the mounting screws to level as needed.
Install Cables
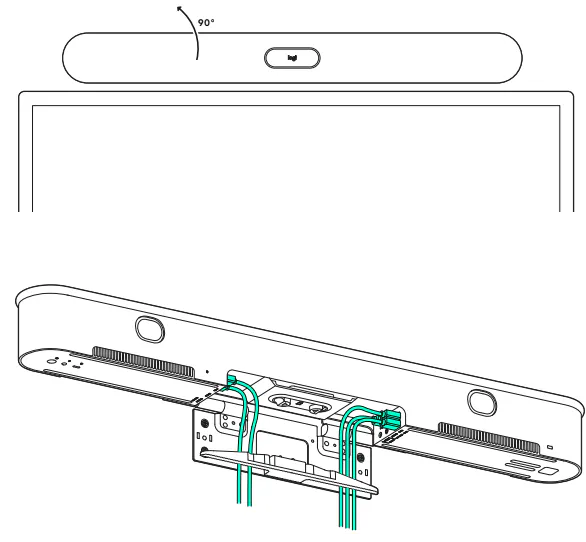
To install cables, rotate Rally Bar 2 upward 90˚. Insert cable connections as desired. Cables plugged on the left side of the should utilize the left side of the cable guide track and conversely for the right.
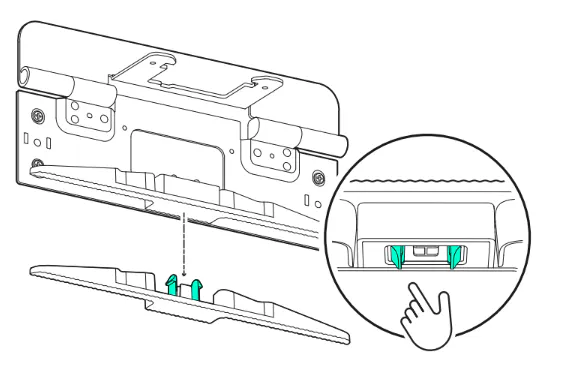
If using larger cables or ferrite-equipped cables, please remove the cable guide to increase capacity.
⚠️ NOTE: If securing cables (with zip ties, velcro, etc) behind the display, be sure to leave enough slack that the device can be rotated downward without placing strain on the cables.
Power On Rally Bar 2
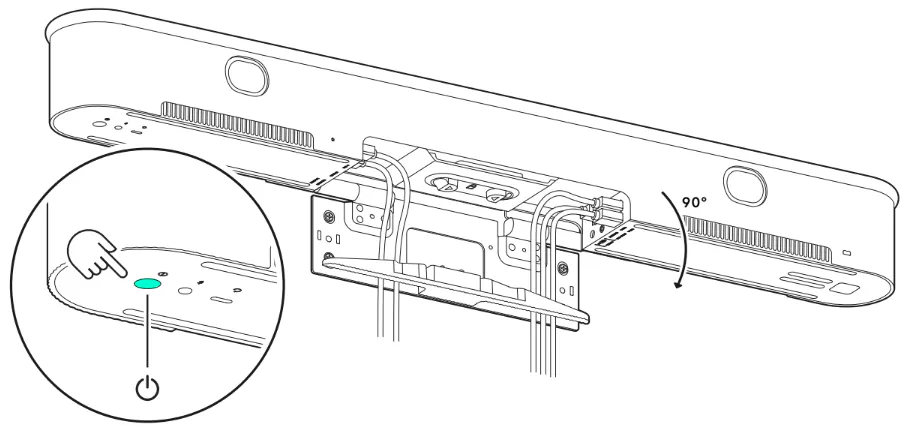
Power on the device. Rotate the product down slowly, managing cable slack in order to avoid pinching cables.
Remove Rally Bar 2 from Wall Mount
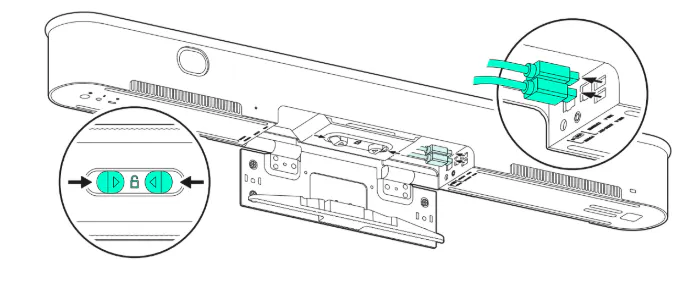
To remove Rally Bar 2 from the wall mount, rotate the product up 90˚ and unplug all cables.
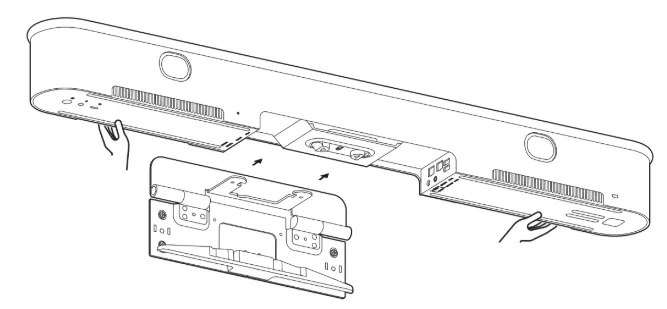
While supporting the device with one hand pinch the release features together and slide the product away from the wall.